Saturday, December 11, 2010


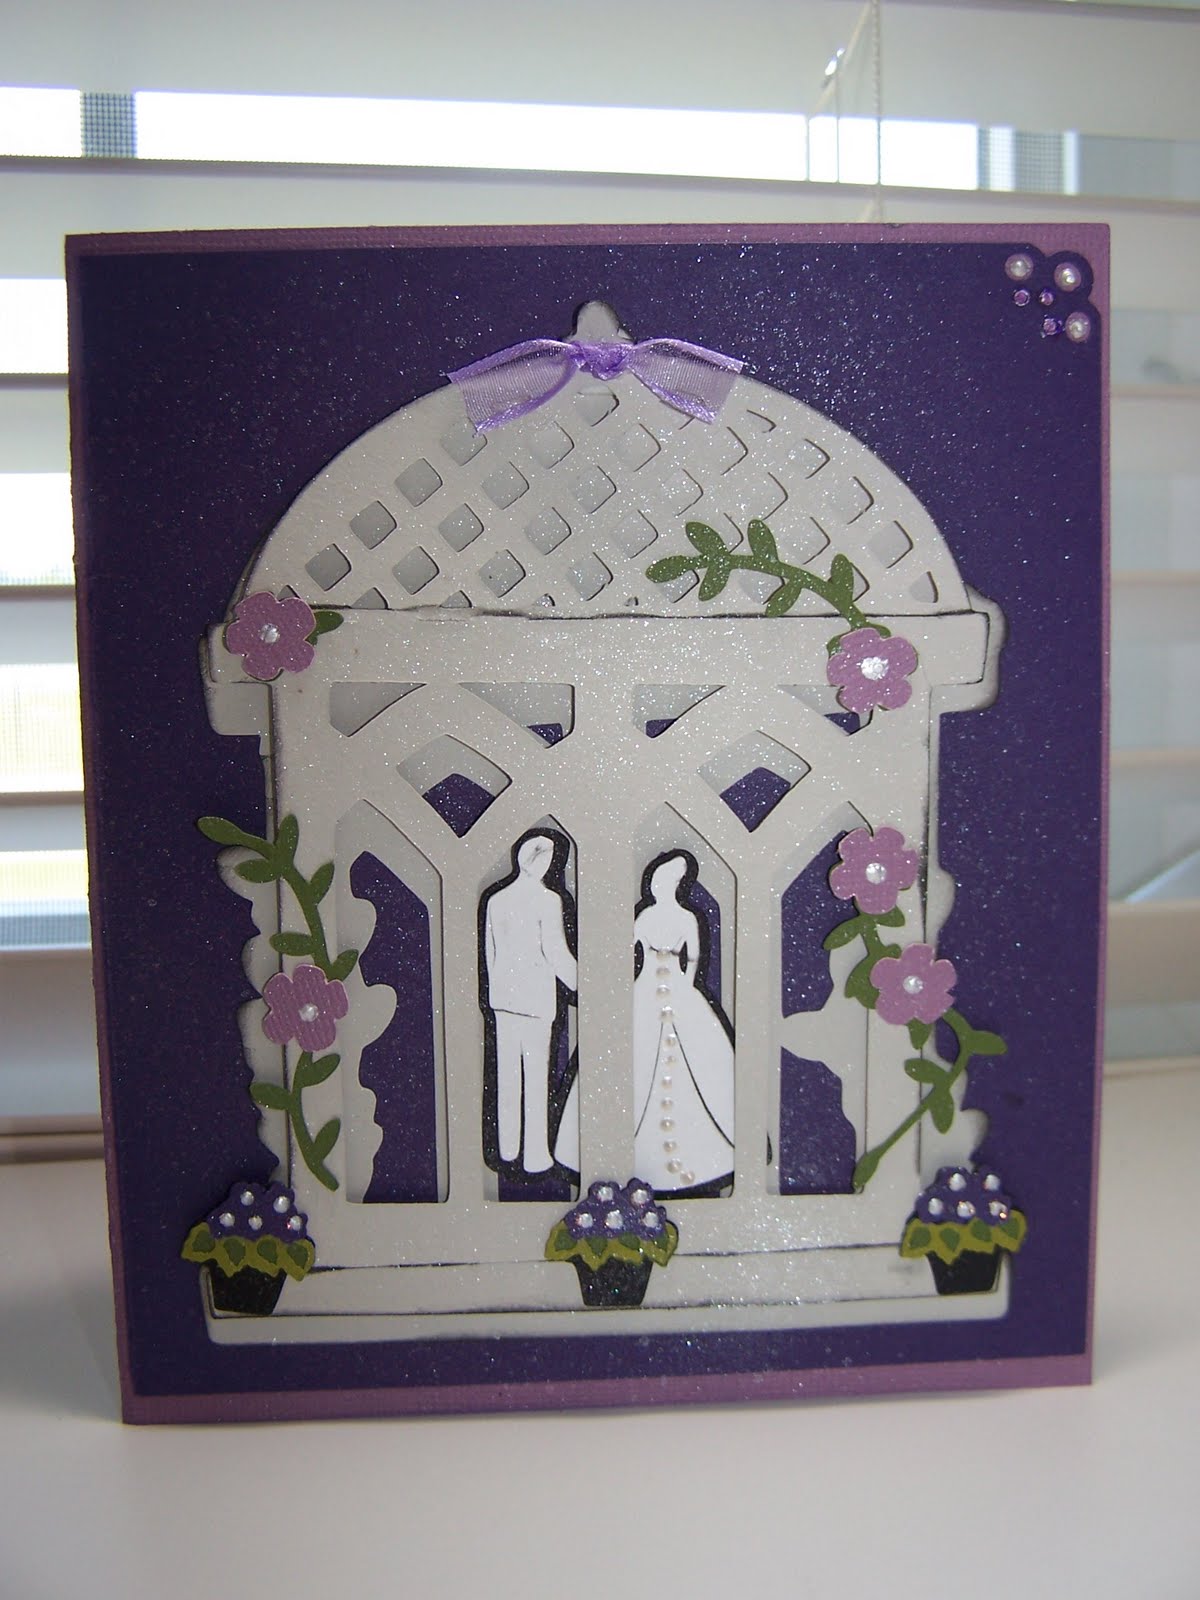
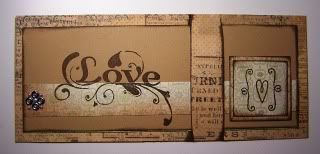
Our project this week for the design team at www.MySheriCrafts.com is "PARTIES"

Saturday, December 4, 2010

Tuesday, November 30, 2010


This is 2 separate cards, 3 1/2 x 9 The tree is cut from heavy metalic paper using the Cricut cartridge Lyrical letters, Cut in half and placed on the edge of the card base. The sentiment is cut from a Cricut cartridge also. The black jewels are glued on and placed randomly.


Saturday, November 27, 2010

The theme for this weeks My Sheri Crafts design team was "Hello"

Thursday, November 18, 2010

Friday, November 5, 2010


The design team at My Sheri Crafts was given our project for this week, Veterans/Troops

Tuesday, October 12, 2010

Friday, October 8, 2010


"Stitching" The theme for us this week at "My Sheri Crafts"
So I got out my sewing machine, dusted it off. After moving and being in storage much to my surprise, it still worked.

I started off with a beige card base, covered it in 2 pieces of quality cardstock. Do not adhere it yet. Choose 3 different colors of cardstock and make different sized stitches top to bottom of each color. Cut at different widths.
Cut those stitched papers to fit the top section. Now adhere the bottom to the card base. Then take each strip of choice and adhere to the top paper. Adhere a coordinating ribbon in the middle of the papers (hides the edges of the stitching) My tag is cut from the Cricut cartridge Winter Woodland. (1 cut at 2 1/2 and 1 at 2 1/4) Sentiment is stamped from Stampabilities (Holiday Sentiments) Evergreen punch is from Martha Stewart. Buttons have ribbons tied in the center and adhered. The sleigh is also a button with the hook cut off the back, and adhere with a good thick glue. This card takes a while to make, but I think it turned out nice!

Saturday, October 2, 2010


OCTOBER IS BREAST CANCER AWARENESS MONTH!
Our projects for the design team this week at My Sheri Crafts.com is just that! This is my project.

Losing my mom to breast cancer last year at the age of 67 makes me really stop and remember to do the exams each month and get the mammogram! Please do it too!

Cricut cartridges used-
Lady- Forever Young
Ribbon- Stand and Salute
Letters- StoryBook

Saturday, September 25, 2010


This week is man theme for us at My Sheri Crafts. I find this a difficult theme for me. Not sure why, maybe I should practice it more often!
Enter your projects each week at www.myshericrafts.com for a chance to win!

The truck is cut from the Heritage Cricut cartridge- Heritage

Sunday, September 12, 2010


This weeks project for My Sheri Crafts Design team was
"Thinking of You"

I like to do easy quick cards, that are clean, simple and basic sometimes. This one fits into that category just perfect, and still looks great.

Start with a good quality card-stock to cover front of card base.
Cut 1 piece of coordinating paper for the 4 boxes. Then fold it in half, and then again in half lengthwise, cut on the folds. Adhere it. Cut a circle from the George cartridge, and then the doily bird cut from Cindy Loo. Pop it with foam pop dots.
Cut another piece of coordinating paper to place along the bottom edge. Embellish with a bow. Rub on transfer for sentiment is by Making Memories (wordage expressions)

Finish off the inside of card with scrap papers from the front of the card.
The inside of card

Saturday, September 4, 2010

This weeks project for My Sheri Crafts Design Team is a Labor Day Theme. I went with the vintage postage stamp look. The first Labor Day was September 5, 1882.

Supplies:
quality cardstock for base (4 3/4x 6 1/2)
choice of paper to cover card base-Provo Craft Americana by Michelle Anderson
dark blue cardstock for upper strip
vintage buttons
ivory ribbon
parchment paper for tag under print
photos printed from VintageWorkshop CD's
edges inked with Cats Eye inks
adhesives-ATG, Avery permanent glue stick for buttons

Friday, August 27, 2010


Buy a pull top can-(many fruits and soups now have the pull top) Open the bottom with a safety can opener. (Just be sure to use a safety opener so there are no sharp edges!) Remove the contents. Wash the can and remove the label. Add your contents to the can, and glue the bottom back on. I used gorilla super glue. Then you just need to wrap it your choice of papers and embellies!
Adhere to can, and add ribbon and embellies to the pull tab. This can could be stuffed with baby booties, pacifiers, small toys, a sleeper rolled up, Dollar bills for the new mommy and baby!

Saturday, August 21, 2010

Start with a quality cardstock for base, cover front with your choice of paper. Cut a base circle to fit in the center of card. Then cut a circle out of paper for next layer. I topped with another layer of Velum. Adhere all to that order. Place ribbon of your choice down the side of card, and tuck under the paper covering the card base.
Hand cut is from the Cricut Sentimentals cartridge, with a feather glued to it. Miss you sentiment is also from Sentimentals. Button embellishment is a vintage button from my DH family. Edges inked with Cats Eye.